30 October 2009

Spiced Pumpkin Seeds, Version Two

Last year, my sister Jenna made spiced pumpkin seeds using the guts from her drunk pumpkins.  This year, I was so excited to try another spiced pumpkin seed recipe.

I found this recipe on All Recipes, and it turned out great.  I was afraid it would be too much salt, so I subbed garlic powder.  Don't repeat my mistake - they weren't salty enough!  Follow the recipe as is, you'll be happy with the results.


Spicy Pumpkin Seeds
from All Recipes

2 c. whole raw pumpkin seeds
2 tsp. Worchestershire sauce
1-1/2 tbsp. margarine, melted
1/2 tsp. salt
1/8 tsp. garlic salt

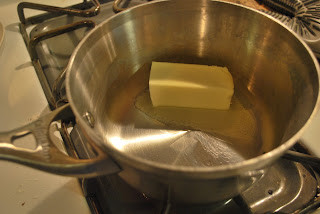
Melt margarine (or butter) in a bowl.  You can sub olive oil as a healthful alternative.  Toss pumpkin seeds with margarine, Worchestershire, and spices until combined.

Spread onto a cookie sheet, bake 45 minutes in a 275 degree oven.  Stir occasionally.  Store in an airtight container.

This was the third item I distributed to friends.


Tomorrow is Halloween!  Hooray for ghosts, goblins, and witches!

29 October 2009

Pumpkin Chocolate Chip Muffins


These muffins are a nice fall treat.  I saw these on The Beantown Baker - she got the recipe from somewhere else and changed it around, eliminating the streusel topping.  I took TBB's version and further altered it - omitting the dried cranberries and subbing in chocolate, and swapping applesauce for the oil.  The recipe below reflects "my" version.


Pumpkin Chocolate Chip Muffins
adapted from TBB's Pumpkin Cranberry Muffins

1 c. pure pumpkin, packed
1/3 c. applesauce
2 large eggs
1/2 tsp. cinnamon
1/4 tsp. nutmeg
1 tsp. baking powder
1/2 tsp. baking soda
1/2 tsp. salt
1-1/4 c. sugar
1-1/2 c. flour
3/4 c. semisweet chocolate chips

Preheat oven to 350 degrees.  Line muffin tin with paper liners.

Whisk together all ingredients but the flour and chocolate chips until well mixed.  Add flour and chocolate, stir to combine.

Pour batter into muffin cups - it should fill them about 3/4 full. 

Bake 25 minutes (15 for mini muffins).  Allow to cool in the pan for a minute or two:


Then transfer to a baking rack to continue cooling.


I was able to get a dozen mini muffins and ten regular sized muffins from this recipe.  TBB says it should yield a dozen regular size muffins, so either those mini muffins are really tiny, or my regular muffins weren't as large as they should be.  They are the perfect size for breakfast though, so I was happy with the result.

I packaged up the mini muffins to send to friends.


We haven't been experiencing the pumpkin shortage other parts of the country have seen, but I just wasn't getting in the pumpkin spirit.  The can on my pantry shelf beckoned, and finally I answered its call and made these muffins.  Since the recipe only calls for one cup, I have plenty of pumpkin left from my 29 ounce can.  So the only question is, what pumpkin treat should I make next??

28 October 2009

Spooky Spiders

Spooky Spiders are a Halloween treat that harkens back to my childhood.  My mom always made them in the week or so leading up to Halloween, and my friends (especially Kristi!) would vie to sneak them off the tray before the Halloween festivities got under way.

These are an easy treat and make a nice addition to any Halloween get-together. 


Spooky Spiders

1 bag chow mein noodles


1 bag semi-sweet chocolate chips


Melt chocolate chips in a double boiler or in the microwave.


Mix chow mein noodles into the melted chocolate.


Use two forks to drop "spiders" onto wax paper covered cookie sheets. 


Allow to cool and harden completely.


Spooky Spiders are a great Halloween treat!  Crunchy, chocolatey, small enough to shove a whole one in my mouth and hold two more in my hot little hand.  I packaged some up to send to friends, along with a few other treats - I'll share those recipes in the next few days as we get closer to Halloween!!!


27 October 2009

Skillet Apple Cake with Caramel Frosting


After seeing this recipe on The Pioneer Woman's website, I knew I wanted to make an apple cake in my cast iron skillet.  I made a beautiful one last year, but I wanted something a bit different.  I couldn't make The Pioneer Woman's recipe because it called for sour cream, which I didn't have on hand. 

So I used the scientific method I rely on when I need a recipe - I googled until I found a recipe whose ingredients matched my pantry.  Recipe Zaar had a cake that fit my ingredients.  Originally published in The Cast Iron Skillet Cookbook, this apple cake is a delicious ending to any fall meal.  (And it makes a great breakfast too!)


Apple Cake with Caramel Frosting
adapted from this recipe

Cake
2-1/3 c. flour
1-1/2 c. sugar
2 tsp. baking soda
1/2 tsp. salt
1 tsp. cinnamon
1/4 tsp. nutmeg
4 c. peeled, grated apples
1/2 c. softened butter
2 eggs

Frosting
1/3 c. butter
1/2 c. brown sugar
3 tbsp. skim milk
1/2 tsp. vanilla extract
1-1/2 c. powdered sugar
1/2 c. chopped walnuts


View my apple grating setup - note, it took me a long time to grate four cups of apples.  And a lot more apples than I was anticipating.  Just be prepared.


To make the cake

Preheat oven to 350 degrees.  Spray a 10" cast iron skillet with cooking spray.  Lightly dust with flour - I used a pastry brush to move the flour lightly over the greased pan. 


Mix together flour, sugar, baking soda, salt, cinnamon, and nutmeg in a large bowl.  Add the apples, butter, and eggs to the bowl and beat with an electric mixer until well combined. 


As you can see below, I forgot to add the sugar until this step. Oops!


Spread the batter into the greased and floured skillet. I used a spatula to make sure it was evenly spread.


Bake 40-45 minutes, cool in the pan.


To make the frosting


Melt the butter in a medium saucepan. 


Add the brown sugar until it dissolves completely.  Add the milk and bring to a boil. 


Stir thoroughly, then transfer to a bowl and let the frosting cool for at least ten minutes. 


Whisk in the vanilla and powdered sugar.  The frosting will get much thicker during this stage.


Spread over the cooled cake.  Don't mess around at this point - the frosting starts to cool and harden quickly, and the longer you play with it, the less smooth it will be.


Sprinkle with the chopped walnuts.


People will really like you when you serve them this cake.  It is so moist, with just the right amount of frosting to add sweetness.  Andrew's brother took his first bite of cake, then when he heard I made it, blurted out (with his mouth full of cake, I might add):  "you made this cake?"  Thanks Jimmy!


Here I am, serving some cake at Andrew's parents' house:


Then, Andrew started doing the Austin Powers "work it, work it" as he was taking the picture, so I laughed and he took a picture of that too.


The leftover cake is really good if you microwave it for 25 seconds or so - the caramel frosting gets melty and starts to ooze into the cake and...


...I better stop now.  Grating those four cups of apples is still fresh in my memory, and I'm sure Andrew won't agree to grate them for me.  Darn.


23 October 2009

Parmesan Crusted Tilapia


Some people are scared of cooking seafood at home.  They may not have grown up in a family that ate seafood, they may dislike the smell of fish cooking, or they may not realize the vast benefits of adding fish to your diet.  If you are a novice at preparing (or eating!) seafood, tilapia is a great place to start.  A mild white fish, tilapia has a subtle flavor that doesn't overpower wary diners. 

At my supermarket, I can buy individually wrapped, boneless, skinless, frozen tilapia filets from Tropical Aquaculture.  These are a fantastic staple to keep on hand, as they can easily become a dinner entree on a busy night.  Prepare tilapia as you would chicken - baked, fried, poached, steamed, grilled, or broiled.  You can cut it into chunks and create an easy fish chowder, or mix into fresh veggies for a simple stir fry. 

This is an easy preparation that will work for any mild white fish fillet.  The flavor from the herbs and cheese prevent the fish from becoming bland or boring.  Baking preserves the buttery taste of the fish without adding unnecessary calories.


Parmesan Crusted Tilapia

2 tilapia filets
1 tbl. Italian seasoning
1/2 c. Parmesan cheese
1/4 c. breadcrumbs
1 egg
salt & pepper


Scramble egg on a plate, set aside.  On a paper plate, combine breadcrumbs, Italian seasoning, cheese, salt, and pepper.


Rinse tilapia, pat dry with a paper towel.  Salt and pepper both sides.  Set up an assembly line - fish, egg, and breadcrumbs/cheese.


Dip both sides of fish in egg, then coat both sides in breadcrumb mixture.  Lay on a lightly greased cookie sheet.  Bake in a 425 degree oven for 10-12 minutes, or until fish is opaque and flakes with a fork.


For a simple but delicious meal, serve with baked potatoes and steamed broccoli.


22 October 2009

Lemon Sorbet


After breaking in my ice cream maker with vanilla and vanilla-strawberry ice cream, as well as a fantastic go at cookies 'n' cream, I decided to try something different.  I was thinking something fruity, but different than the vanilla-strawberry.  I settled on lemon sorbet when all but one of the ten lemons Andrew bought at the farmer's market had been sitting there for a week untouched.

I used the recipe in the booklet that came with my ice cream maker.  The vanilla and cookies 'n' cream had come out so well that I trusted KitchenAid not to steer me wrong, and my faith was well founded.  The lemon sorbet is tart, yet sweet, light, and delicious. 


Lemon Sorbet

1-1/4 c. simple syrup
2 c. lemon juice

Yup, that's really it. 

To make the simple syrup, you want to use equal parts sugar and water.  The recipe in the booklet tells you to use 2 cups of each to yield 3 cups of simple syrup.  As you can see, this recipe only calls for 1-1/4 cups.  Don't worry, I did the math for you.  You'll need to use 1-2/3 cups each of sugar and water to make 1-1/4 cups simple syrup. 

Combine sugar and water in a saucepan, bring to a boil, cook about 10 minutes. 


Transfer to an ice bath, stirring until well chilled.


I put the simple syrup in a medium sized measuring cup, then put that cup into a large measuring cup about one third full of ice water.


While the simple syrup is cooking, you'll want to prep your lemons.


I cut each lemon in half, then juiced them into a measuring cup.  When I had a little more than I needed, I got ready to strain the juice into a bowl.


This gave me the opportunity to get rid of all the pulp and seeds, leaving me with pure lemon juice.


I covered this bowl and the container of simple syrup and chilled the juice completely.

When I was ready to make the sorbet, I set up my ice cream maker and combined the lemon juice and simple syrup.


Now you just have to let it churn, baby, churn!  (I feel like I've made that pun before.  I apologize if I'm repeating my lame jokes.)

Action shot:


After ten minutes of churning on Speed 1, you will have beautiful lemon sorbet.  Before you freeze it, it will have a soft, homemade Italian ice consistency.  I love it at this stage!


I opted to freeze my sorbet in some smaller containers, to assist Andrew and I with portion control.


Sorbet is an easy option to use up leftover fruit, or to provide a (slightly) more healthful option to ice cream.  Though there's tons of sugar, it's fat free...so that has to count for something!

19 October 2009

Strawberry Peach Smoothies

When I make a yogurt smoothie, I always use Dannon Light n' Fit vanilla yogurt.  Mostly because that is the only kind of yogurt I eat.  When Andrew requested one of my "famous smoothies", I figured I'd use his yogurt. 


Strawberry Peach Smoothie

1 container Dannon "Fruit on the Bottom" peach yogurt
10 halved pieces frozen strawberries (mine are halved, so this is 5 strawberries)
1/4 c. orange juice


Combine all ingredients in a rocket blender.  If all you have is a regular blender, that's okay too.


Puree until smooth, and enjoy!


Smoothies are great for breakfast or as a snack anytime.  They are healthy and delicious.  You can add flaxseed oil, protein powder, fiber, or your supplement of choice to make them even more nutritious.

Butternut Squash Bisque


Sometimes when I want to make something I've never made before (or just haven't made in a while), I look up a recipe online, then loosely follow the ingredients and directions.  I knew I wanted to make a butternut squash soup, I just wasn't sure exactly how I wanted to do it.  I made one last year, but it was extremely thick and tasted like mashed butternut squash that had been thinned out a little.  I wanted something a little more sophisticated this time.

Butternut Squash Bisque

2 medium butternut squash
1 medium onion, chopped
3 stalks celery, minced
2 tbl. extra-virgin olive oil
1 c. chicken stock
1 c. fat free half-and-half
1 c. water
1/2 tsp. dried thyme
1/2 tsp. ground sage
salt & pepper


In a large stock pot, heat olive oil over medium-high heat.  Add onion and celery, then thyme, sage, salt, and pepper.  Stir to coat vegetables in oil; saute until translucent and soft. 

While the veggies saute, prick butternut squash in several places with a knife or fork.  Microwave on high for 5-7 minutes or until soft.  Remove from microwave, allow to cool.  Slice squash in half and scoop out the seeds.  Use a large spoon to remove all squash from skin. 

Add chicken broth and water to the stock pot.  Bring to a simmer over high heat, and add squash to liquid.  Simmer as long as desired - at least 15 minutes. 

Using an immersion blender, puree soup until smooth.  If you don't have one, transfer soup to a regular blender and puree.  Be careful not to fill the blender too full, and hold the top on, as the heat of the soup can force the top off if you don't!  Return soup to pot.

Stir in the half-and-half, bring soup back to a low simmer.  Remove from heat and serve immediately.  The original recipe garnishes with croutons, but I opted to serve my soup with a beautiful loaf of Italian bread, so we skipped them.


This soup is a comforting, rich dish that will warm you up and put you in the spirit of fall.  This would be a great meal for Halloween night, as it is quick and easy to prepare.  Using fat free half-and-half keeps the calorie count down, and you could use vegetable stock if you wanted to make this a vegetarian meal. 

Andrew and I both enjoyed the velvety texture and delicious flavor of this soup.  It's definitely one I will make again.