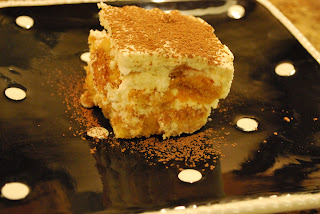
It's been quite a while since I did a post where I share step-by-step photo instructions. Tiramisu seemed like the perfect opportunity to remedy that fact. My sister Jenna is in town for a few days, and she wanted to cook together, so I planned several fun recipes for us to try. We spent a couple hours at West Side Market yesterday choosing the perfect ingredients, then got to work in the kitchen.
This tiramisu is absolutely delicious. Light and airy, it's neither soggy nor heavy as other versions can be. I skipped the brandy/liqueur, so there's no alcoholic bite either. I would recommend increasing the amount of espresso syrup used so that the tiramisu isn't dry - the recipe below reflects my changes.
Tiramisu
adapted from Heavenly Tiramisu
espresso syrup
1/2 c. water
1/2 c. sugar
1 c. strong espresso
mascarpone cream
1 c. heavy cream
1/3 c. sugar
2 tsp. vanilla extract
16 oz. mascarpone cheese, softened
1/2 lb. savoiardi (ladyfingers) - about 28 cookies
cocoa powder
for the syrup
Combine water and sugar in a small saucepan and bring to a simmer, stirring occasionally. Remove from the heat and stir in espresso. Pour into a shallow dish and set aside to cool.
for the mascarpone cream
Whip the cream until soft peaks begin to form, then with the mixer running, slowly add in the vanilla and sugar. Scrape whipped cream into a separate bowl, set aside.
Place the mascarpone cheese into the mixer and whip until light and fluffy. This will make it much easier to fold into the whipped cream.
See how light and fluffy it is? Much easier to work with than the original consistency, which is similar to cream cheese.
Gently fold the whipped cream into the whipped cheese. I like to add the cream in two batches so I can get it as fully incorporated as possible without losing all the air.
I love a good assembly line, and this is a great excuse to set one up. Set out a shallow 2-quart baking dish. Next to it, set your shallow container of espresso syrup, and next to that, a pile of ladyfingers.
Dip each ladyfinger in the espresso syrup, flip to coat the other side, then arrange in the baking dish.
Top the layer of ladyfingers with half the mascarpone cream.
Repeat the process of dunking the ladyfingers and arranging them. Top with the remaining half of the mascarpone cream.
Using the end of a wooden spoon, poke holes in the top mascarpone layer.
Spoon the remaining espresso syrup into the holes so it can soak down into the dessert. Yum!
Smooth the top of the tiramisu so the holes no longer show. Look how pretty!
I was afraid that plastic wrap would destroy the smoothness of the top layer, so I used a larger baking dish as a cover. Refrigerate the tiramisu up to 24 hours before serving.
When you're ready to serve. slice into squares and sprinkle with cocoa powder. This is a fabulous dessert that comes together relatively easily. Though there are several steps, two people can put this together in no time with impressive (and delicious!) results.


1 comment:
This Tiramisu looks FABULOUS. Probably because you're amazing sister (ME!) helped!!!
I loved seeing you this week :)
Post a Comment